How to create and host a GitHub Pages site with Jekyll
📅 7 May 2024
I have long been jotting down drafts for blog posts on various topics that come to my mind, and even ran down the road of building a fully functional blogging site in Blazor at one point. However none of these efforts have seen the light of day for one simple reason: the time required to get to the point of being able to write and publish blogs was just too much. So to finally get the ball rolling, I’ve done as all good software engineers should and kept it simple.
Here’s my guide to go from having nothing but a GitHub account to a fully functional blog site up and running in a few minutes.
Prerequisites
Before jumping in, there are a couple of prerequisites to tick off the list:
- Docker desktop installed 👉 Get it here
- GitHub account created 👉 Sign up here
Don’t worry if you aren’t 100% clued up on Docker, I’ll give a rough breakdown of the commands and arguments we’re using as we go.
Create your GitHub Pages repository
Head over to GitHub and create yourself a repo to house your blog. At the time of writing, you’ll need to make this public in order to enable GitHub Pages for it on a free tier account. While you’re there, you may as well choose to add in the default Jekyll .gitignore file.
Let’s create our site
Start off by opening up a terminal and cloning the GitHub repo you just created locally. From there we can navigate into to the root directory of the repo we just cloned.
git clone https://github.com/CharlieJKendall/blogs-demo.git
cd blogs-demo
If you head over to the Jekyll docs site, there’s a quick start section explaining all the prerequisites along with various guides on how to install everything necessary that is littered with warnings and caveats about things that may or may not go wrong depending on a variety of factors. Being the cynic that I am, and having no intention of installing Ruby on my machine, I very quickly decided I wasn’t going to go down that route. Luckily for us, Docker makes everything simpler.
The Jekyll community provide several images we can use for all of our Jekyll needs. The one we’re interested in to start is the main Jekyll image, so let’s pull that down locally:
docker pull jekyll/jekyll:4
Now we’ve done that, we can spin up a container and get ourselves set up with a shiny new blogging site - but first, make sure you’ve got Docker set up to use Linux containers instead of Windows containers. We need to run the following command from the terminal we’ve got open in the root of our repo:
docker run \
  --rm \
  -it \
  --volume="%CD%:/srv/jekyll" \
  --volume="%CD%/vendor/bundle:/usr/local/bundle" \
  -p 4000:4000 \
  jekyll/jekyll:4 \
  bash
If you aren’t too familiar with docker, that command has just a little bit going on so let’s break it down:
docker run- tells Docker that we’d like to run a container using an image that we’ll specify as an argument further down--rm- remove the container when the command has completed-it- allows us to run commands against the container using our terminal--volume="%CD%:/srv/jekyll"- map our current local directory to the/srv/jekylldirectory in the container. This is how we allow the container to see the files on our computer (and vice versa)--volume="%CD%/vendor/bundle:/usr/local/bundle"- similar to the above. This directory is where Ruby Gems (thinknpm/node_modulesbut for Ruby) are cached, so mapping this will prevent us having to refetch them every time we kill the container-p 4000:4000- maps port 4000 from the container onto port 4000 on localhost. This is the default port that Jekyll serves sites overjekyll/jekyll:4- the name and tag of the image we want to runbash- the entry point we want to execute on the container. This is where our terminal input will be forwarded to
…aaand here it is as a one-liner just in case you wanted to copy and paste it straight into that terminal 😉
docker run --rm -it --volume="%CD%:/srv/jekyll" --volume="%CD%/vendor/bundle:/usr/local/bundle" -p 4000:4000 jekyll/jekyll:4 bash
Note: If you are using a bash terminal rather than command line, you will need to replace %CD% with $PWD (this is a variable representing the current directory that the terminal is targetting)
Now that we’re in a bash terminal to our container, we need to run a few commands to grant a some additional permissions to the jekyll user and then we’ll actually create our site:
chown -R jekyll /usr/gem/
chown -R jekyll /srv/jekyll/
jekyll new . --force
bundle add webrick
bundle lock --add-platform x86_64-linux
jekyll serve --force_polling
Once more, let’s break this down step-by-step:
chown -R jekyll /usr/gem- recursively changes the ownership of the/usr/gem/directory and all of its content tojekyllchown -R jekyll /srv/jekyll- same as above, but for the/srv/jekyll/directoryjekyll new . --force- creates a new Jekyll site in the default Jekyll directory:/srv/jekyll/(remember we have mounted a volume against our local filesystem, so any files created here will also be present there)bundle add webrick- adds a Ruby Gem forwebrick.jekyllneeds this in order to buildbundle lock --add-platform x86_64-linux- allows us to build on Linux machinesjekyll serve --force_polling- build and serve our new website on the default port (4000) on the container which we have mapped to port 4000 on localhost
And voilà… assuming all went well, you will be able to navigate to http://localhost:4000 in a web browser and see your site in all its glory! Having specified --force_polling, we’re able to change files on our local machine and jekyll will automatically rebuild the site so we can easily preview changes with a quick slap of the F5 key 👋⌨️ Go ahead and make an edit to the index.markdown file, save it, and refresh your browser to see the updated index page. If you close your terminal window or exit out of the container, all you need to do is execute the docker run command followed by jekyll serve --force_polling to get up and running once more!
How do I deploy this site to GitHub Pages?
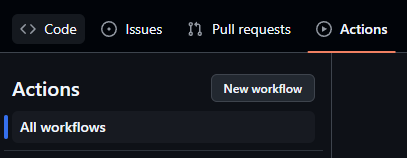
A very good question, and one that is answered almost upsettingly easily using GitHub actions. Before continuing, make sure you have pushed up the output from the previous step to your repository. We’ll need a workflow capable of building and deploying our site to GitHub Pages, which we can create by browsing to your repository on GitHub and selecting the ‘Actions’ tab along the top navbar, followed by the ‘New workflow’ button.
Once there, search for the appropriately named ‘Jekyll’ template (not ‘Jekyll Pages Jekyll’!) and hit the ‘Configure’ button which shoots us over into the web IDE with a fully populated YAML workflow file. At the time of writing, it really is as straightforward as committing the file as-is and watching the action build and deploy the website. If everything has gone to plan, you should now have a little green tick next to the latest commit name at the top which can only be a good thing, right? ✅

Even better than that, your repository home page should have a bold ‘Deployments’ section to the right-hand side informing you that your latest commit has successfully been built and deployed. Now all we need to do is open up the link there and we should be presented with a Github Pages URL that we can access our site from. In my case, it’s https://charliejkendall.github.io/blogs-demo/.
Nice, what now?
Honestly, you’re pretty much good to go. You have a site that you can write blogs for in markdown and publish them online. If you’re not familiar with Jekyll, I highly recommend running through their step by step tutorial to get the basics down. If you’re interested in a custom domain, GitHub have some great documentation on how to host your github.io site on your very own domain right here.